
Introduction to Sticky Coconut Rice with Chicken
Cooking at home can often feel like a chore — but what if I told you that the right recipe could change all that? Enter sticky coconut rice with chicken, a dish that perfectly combines convenience and flavor. This one-pot wonder not only takes minimal prep time but also allows you to indulge in a creamy, savory experience without breaking a sweat.
Why Choose Homemade Sticky Coconut Rice with Chicken?
Making this dish from scratch means you control what goes into it, ensuring freshness and quality. Plus, the combination of coconut milk and chicken broth creates a rich flavor profile that's hard to replicate with store-bought meals. Imagine breaking bread with friends or family, surrounded by the delightful aroma of ginger and garlic wafting through your kitchen.
Additionally, this recipe is adaptable! Want to make it vegetarian? Substitute the chicken with tofu or your favorite veggies. Curious about spice levels? Toss in some chilies for a kick! You can dive deeper into the versatility of coconut rice in this helpful article.
So, let’s get cooking! Dive into the recipe below and discover just how easy it is to whip up a delightful meal that'll impress anyone at your dinner table.

Ingredients for Sticky Coconut Rice with Chicken
Creating a delightful Sticky Coconut Rice with Chicken dish is easier than you might think! Here, we’ll break down the core ingredients you’ll need, along with some optional flavor boosters to take your meal to the next level.
Core ingredients needed
- Chicken Thighs: 1 ½ lbs of boneless, skinless, cut into bite-sized pieces for juiciness.
- Rice: 1 ½ cups of dry basmati or jasmine rice, rinsed for optimal texture.
- Coconut Milk: One 13.5 oz can of full-fat coconut milk brings rich flavor.
- Chicken Broth: 1 ¾ cups of low-sodium broth to cook the rice perfectly.
- Vegetables: 2 yellow bell peppers, onion, garlic, and ginger add depth and aroma.
- Cashews: ¾ cup, coarsely chopped, giving a lovely crunch.
- Spices & Seasoning: Kosher salt and black pepper for perfect seasoning.
Optional additions for flavor
Feel free to experiment! Enhance your dish with:
- Aromatics: Fresh herbs like cilantro add brightness.
- Citrus: Lime wedges for a zesty finish—don't skip this!
- Spicy Touch: A drizzle of sriracha for those who love heat.
With these ingredients on hand, you're all set for a meal that's not just filling but also bursting with flavor and comfort. Happy cooking!
Preparing Sticky Coconut Rice with Chicken
If you're searching for a delightful one-pot dinner that's both delicious and easy to make, look no further than this sticky coconut rice with chicken recipe. With a handful of fresh ingredients and a few simple steps, dinner will be both satisfying and memorable. Let's dive into how you can prepare this creamy, comforting dish.
Step 1: Prepare the Chicken
Start by preheating your oven to 375°F. While that’s warming up, take your boneless, skinless chicken thighs and cut them into equal-sized pieces—this ensures even cooking. In a bowl, rub the chicken with a tablespoon of neutral oil like canola, then season generously with salt and pepper. This simple step infuses the chicken with flavor and will create a beautiful browned crust when you cook it.
For expert tips on seasoning chicken, check out insights from Serious Eats.
Step 2: Sauté the Aromatics
With your chicken seasoned, grab a large Dutch oven and heat up a couple of tablespoons of oil over medium heat. Once the oil is shimmering, add your chicken in batches. Cook each side for about 2-½ minutes until nicely browned, then transfer the chicken to a plate. Now, in the same pot (and don’t wash it!), toss in your finely diced onions, minced ginger, and garlic. You want to sauté these until fragrant—this is where the magic happens. It takes just about 30 seconds, but trust me, the aroma will be inviting!
Step 3: Combine Rice and Liquids
Next, add your rinsed basmati or jasmine rice to the pot, stirring it to coat in the luscious oil and aromatics. This step isn't just technical—it's about enhancing the flavor! After a minute or so, pour in your chicken broth and coconut milk, followed by the chopped yellow bell peppers. Don’t forget to add half of your roasted cashews for that delightful crunch. Finally, nestle your browned chicken back into the pot, along with any juices that have accumulated on the plate.
Step 4: Nestle the Chicken and Begin Baking
Raise the heat and bring the mixture to a boil. Once bubbling, cover the pot with a lid and pop it in your preheated oven. Bake for about 20 minutes, allowing the rice to absorb all the wonderful flavors and ensuring the chicken remains juicy and tender.
Step 5: Finishing Touches Before Serving
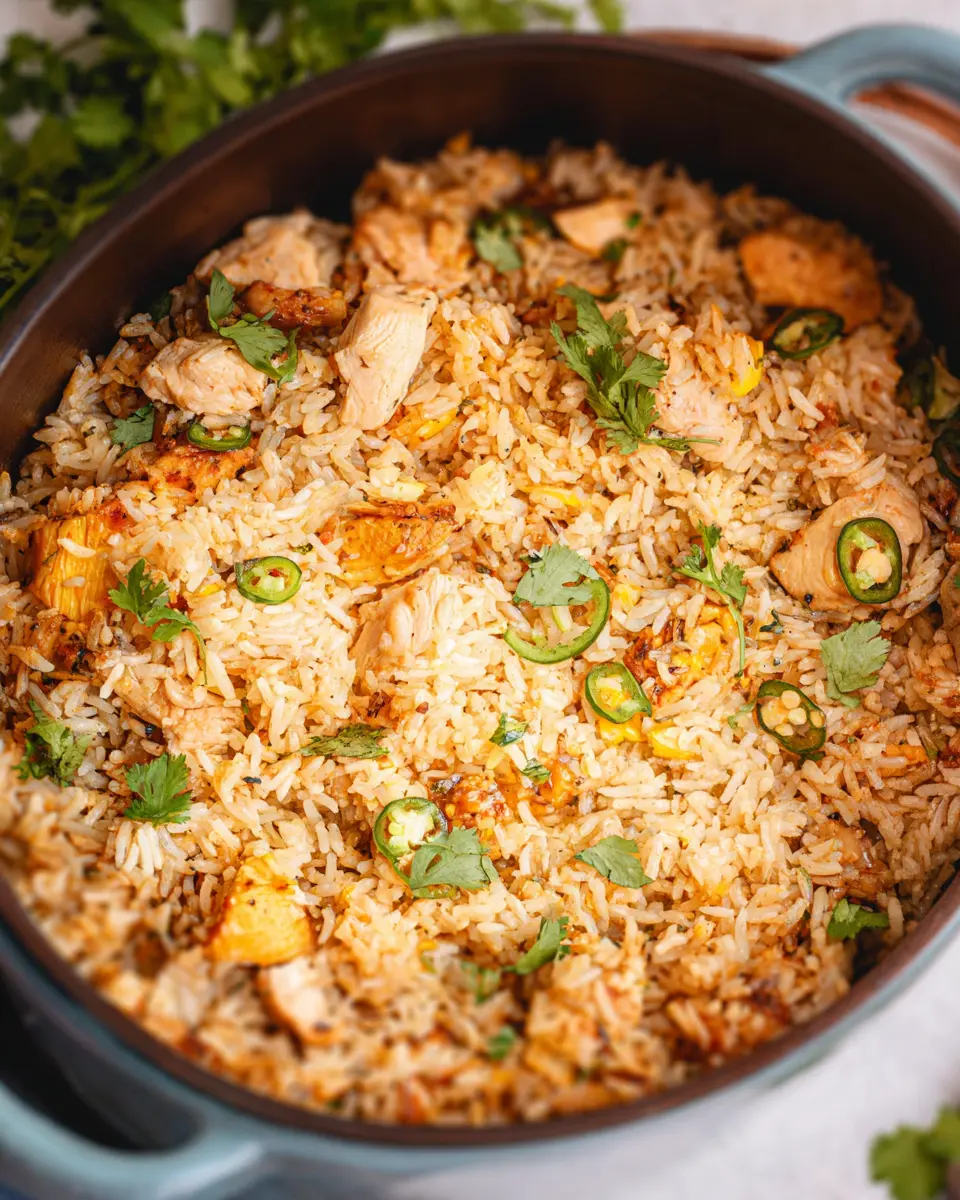
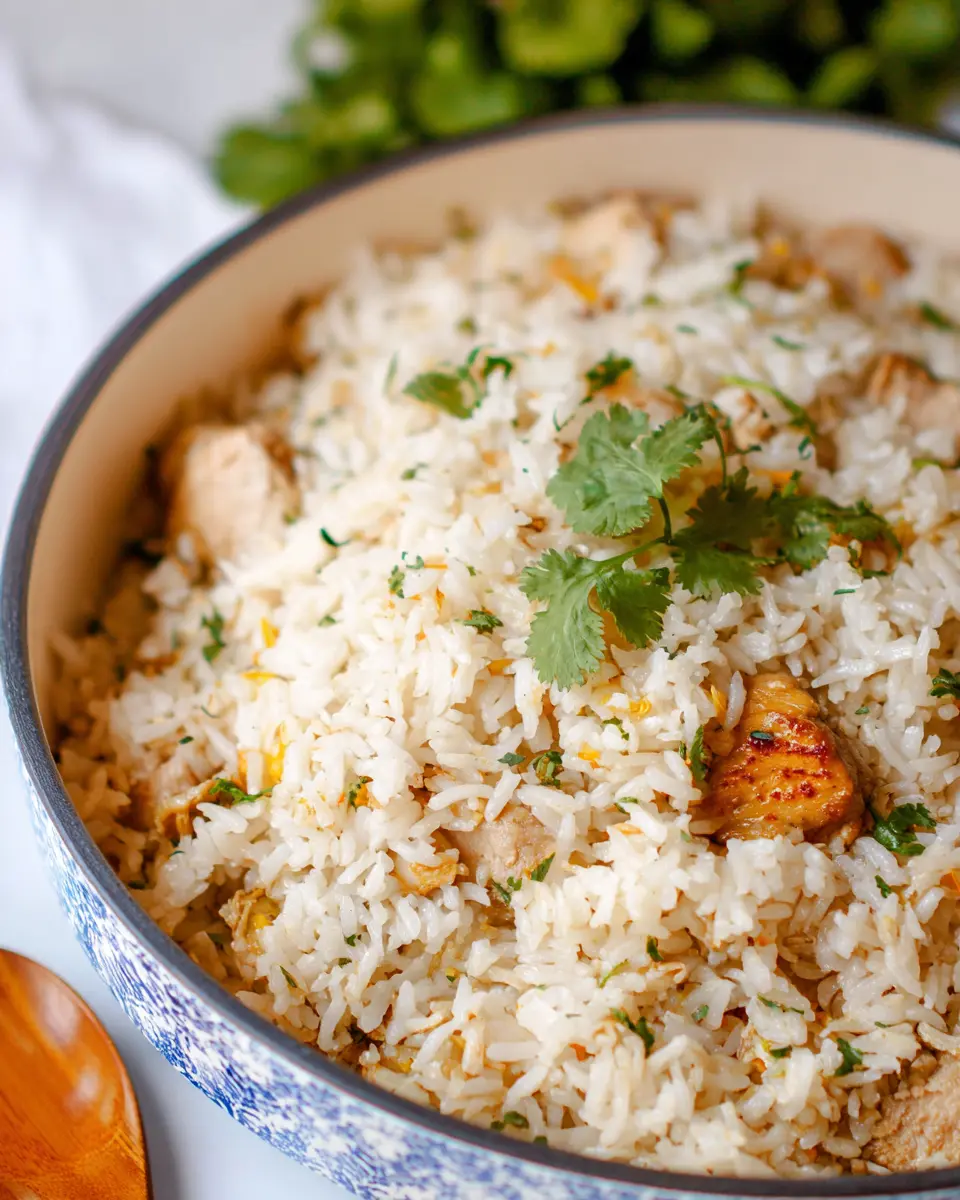
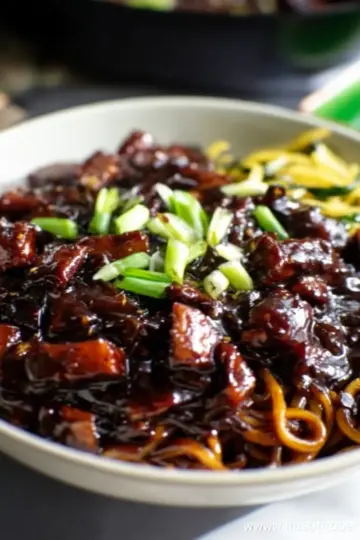
Once you pull your pot out of the oven, take a moment to savor the aroma! Garnish your sticky coconut rice with chicken with the remaining cashews and a scattering of fresh cilantro. Serve with lime wedges for that essential zing and a drizzle of sriracha if you're feeling adventurous with heat. This dish not only looks impressive, but it also combines flavors that will keep everyone coming back for seconds!
With these straightforward steps, you’ve crafted a wholesome meal that’s both comforting and packed with flavor. Enjoy your culinary creation and maybe share the recipe with friends—you know they’ll be asking for it!
Variations on Sticky Coconut Rice with Chicken
One of the best things about sticky coconut rice with chicken is its versatility! If you're looking to switch things up, consider these delicious variations:
Substituting proteins
Swap out chicken for tofu for a vegetarian-friendly option. Just press the tofu to remove excess moisture, then crisp it up in the pan before adding it to your rice mix. Alternatively, shrimp makes for a quick-cooking protein that pairs beautifully with the coconut flavors. Simply sauté them until they're just pink and toss them in towards the end!
Incorporating seasonal vegetables
Make sticky coconut rice with chicken even more nutritious by adding seasonal veggies. Think asparagus in spring, zucchini in summer, or butternut squash in autumn. Just chop them into bite-sized pieces and stir them in with the rice, letting them absorb all those delicious coconut and aromatic flavors. For more tips on seasonal cooking, check out resources like The Seasonal Chef.
These tips not only add variety but enhance flavor profiles while keeping meal prep exciting!
Cooking Tips for Sticky Coconut Rice with Chicken
Achieving the Perfect Texture
To get your sticky coconut rice with chicken just right, start with rinsing your rice until the water runs clear. This removes excess starch and helps achieve that coveted stickiness. Additionally, use full-fat coconut milk for a creamier texture—it's worth it! When baking, ensure your pot is covered tightly. This traps steam and promotes even cooking, making your rice perfectly tender and fluffy every time.
Enhancing Flavors with Spices
For a flavor boost, consider adding spices like cardamom or turmeric to the rice mixture. These not only elevate the taste but also bring gorgeous color to your dish. Fresh herbs like cilantro or green onions at the end add brightness, while a squeeze of fresh lime really ties all the flavors together. Experiment with heat by drizzling sriracha for those who enjoy a kick! For more spices and tips, check out resources like Serious Eats.
With these simple tips, your sticky coconut rice with chicken will be a delicious hit at any dinner table!
Serving Suggestions for Sticky Coconut Rice with Chicken
Adding a Refreshing Garnish
Elevate your sticky coconut rice with chicken by adding a garnish that brightens up the dish. Try using chopped cilantro, fresh scallions, or even sliced chili peppers for a hint of heat. A squeeze of fresh lime juice just before serving not only adds a zesty kick but also enhances the coconut flavors beautifully. If you’re feeling adventurous, a sprinkle of toasted sesame seeds will add a delightful crunch!
Pairing with Side Dishes
While this dish is already hearty and satisfying, serving it alongside refreshing accompaniments can create a well-rounded meal. Consider pairing it with:
- Cucumber salad: A simple mix of diced cucumbers, mint, and a splash of rice vinegar.
- Steamed greens like bok choy or green beans: They will add color and extra nutrients to your plate.
- Mango salsa: The sweetness of mango perfectly complements the savory elements of sticky coconut rice with chicken.
These sides are not only easy to prepare but will enhance the tropical vibes of your dinner, making it all the more enjoyable!
Time Breakdown for Sticky Coconut Rice with Chicken
Preparation Time
You’ll need about 10 minutes to get all your ingredients ready. This includes chopping the veggies, seasoning the chicken, and rinsing the rice. Make it a breeze by gathering everything you need beforehand.
Cooking Time
Once you start cooking, it takes around 40 minutes. You'll quickly brown the chicken and then let the oven work its magic while you kick back and enjoy the enticing aromas filling your kitchen.
Total Time
In just 50 minutes, you’ll go from prepping to plating up a delicious meal of sticky coconut rice with chicken. It’s a manageable timeframe that makes this dish perfect for weeknight dinners or cozy weekends.
If you’re curious about more time-saving tips for meal prep, check out EatSmart for some handy ideas!
Nutritional Information for Sticky Coconut Rice with Chicken
Calories
Serving up a delightful plate of sticky coconut rice with chicken provides approximately 650 calories per serving. This hearty meal not only satisfies hunger but also brings a touch of indulgence with its creamy coconut goodness.
Protein
Packed with protein, a serving of this dish offers around 40 grams, thanks to the chicken thighs. Protein is essential for muscle building and repair, making it a perfect option for those active young professionals looking to maintain a balanced diet.
Sodium
While this delicious recipe brings incredible flavors, it contains about 750 mg of sodium per serving. Opting for low-sodium chicken broth helps keep the salt levels in check, supporting a healthier choice without sacrificing taste.
For more on nutrition and healthy meal plans, you can check out reliable sources such as Healthline or Nutrition.gov. Remember, understanding the nutritional value of your meals can help you make more informed dining choices!
FAQs about Sticky Coconut Rice with Chicken
Can I make this ahead of time?
Absolutely! The sticky coconut rice with chicken is a great meal-prep option. You can prepare everything in advance and store it in an airtight container in the refrigerator for up to 3 days. Simply reheat in the microwave or on the stove, adding a splash of coconut milk if needed to bring back that creamy texture.
What if I have leftovers?
Leftovers? Lucky you! This sticky coconut rice with chicken tastes even better the next day. Just store it in the fridge for up to 3 days. You can either enjoy it cold or warm it up, adding some fresh herbs or a squeeze of lime to brighten the flavors.
How can I adjust the spice level?
If you’re sensitive to spice, feel free to cut back on the Sriracha when serving. Alternatively, you can also swap in milder ingredients like bell peppers or add more coconut milk for creaminess. For those who crave heat, consider adding chopped fresh chilies to the pot during cooking. It’s all about finding that perfect balance for your taste buds!
For more on spice adjustments, check out this helpful guide from the Chile Pepper Madness blog.
Conclusion on Sticky Coconut Rice with Chicken
In conclusion, Sticky Coconut Rice with Chicken is more than just a meal; it’s an experience that brings warmth and satisfaction to your dinner table. This dish is perfect for busy weeknights, blends comforting flavors, and keeps your cooking effortless yet impressive. Enjoy the wonderful marriage of textures and tastes!
If you're interested in exploring more delicious recipes or tips on cooking with coconut milk, check out resources like Coconut recipes from Food Network or Cooking with Coconut Milk tips for inspiration!

Sticky Coconut Rice with Chicken and Cashews
Equipment
- Dutch oven
Ingredients
- 1.5 lbs boneless, skinless chicken thighs cut into 2 equal-size pieces
- 0.25 cup neutral oil such as safflower or canola
- 2 teaspoon Kosher salt
- 0.5 teaspoon black pepper
- 1 small onion finely diced
- 2 tablespoon fresh ginger minced, about a 1-inch knob
- 2 tablespoon fresh garlic minced, about 4 cloves
- 1.5 cups dry basmati or jasmine white rice rinsed until water runs clear
- 1.75 cups low-sodium chicken broth
- 1 13.5 oz can full-fat coconut milk
- 2 yellow bell peppers cored, seeded and chopped (½-inch pieces)
- 0.75 cup roasted cashews coarsely chopped, divided
- 3 scallions green and white parts, thinly sliced (½ cup, packed)
- 1 small handful fresh cilantro roughly chopped
- 1 lime cut into wedges, for serving
- Sriracha hot sauce for serving
Instructions
- Preheat oven to 375° F. Rub the chicken pieces with 1 tablespoon of oil. Season with 1 teaspoon of salt and ¼ teaspoon of pepper over both sides of the chicken.
- In a large Dutch oven, heat 2 tablespoons of the oil over medium heat. Brown the chicken in two batches, about 2 ½ minutes per side (or 5 minutes per batch). Transfer the chicken to a plate and loosely cover with foil.
- Add the remaining 1 tablespoon oil, onions, ginger, and garlic to the empty pot, and stir until fragrant, about 30 seconds. Add the rice and stir until it is evenly coated in the oil and aromatics. Stir in the chicken broth, coconut milk, bell pepper, ½ cup cashews, scallions and the remaining 1 teaspoon salt and ¼ teaspoon pepper. Scrape up any browned bits on the bottom of the pot leftover from the chicken and aromatics. Nestle the chicken on top of the rice mixture, along with any leftover juices from the plate. Raise the heat to high and bring the liquid to a boil.
- Cover and bake until all of the liquid is absorbed, rice is tender and chicken is cooked through, about 20 minutes. Season with salt and pepper to taste. Scatter cilantro and the remaining ¼ cup of cashews over the chicken and rice. Serve with lime wedges to squeeze (a must!) and sriracha lightly drizzled over the top (if desired).

Leave a Reply