
Introduction to Classic Baked Chicken
Baking chicken at home brings not just a warm meal but also a sense of accomplishment. If you've ever struggled with dry chicken or complicated recipes, classic baked chicken is here to rescue your dinner time. With just a few ingredients and a simple method, you can create a dish that's both flavorful and satisfying.
Why you’ll love making classic baked chicken at home?
This recipe is perfect for busy weeknights or when entertaining guests. With a prep time of only 15 minutes and a cook time of around 50 minutes, you can focus on what truly matters—enjoying the moment with loved ones. Plus, you likely already have the staples in your pantry like olive oil and seasoning, making this a budget-friendly option!
Another reason you'll fall in love with this dish is its versatility. It pairs beautifully with sides like mashed potatoes or steamed vegetables, allowing you to customize every meal.
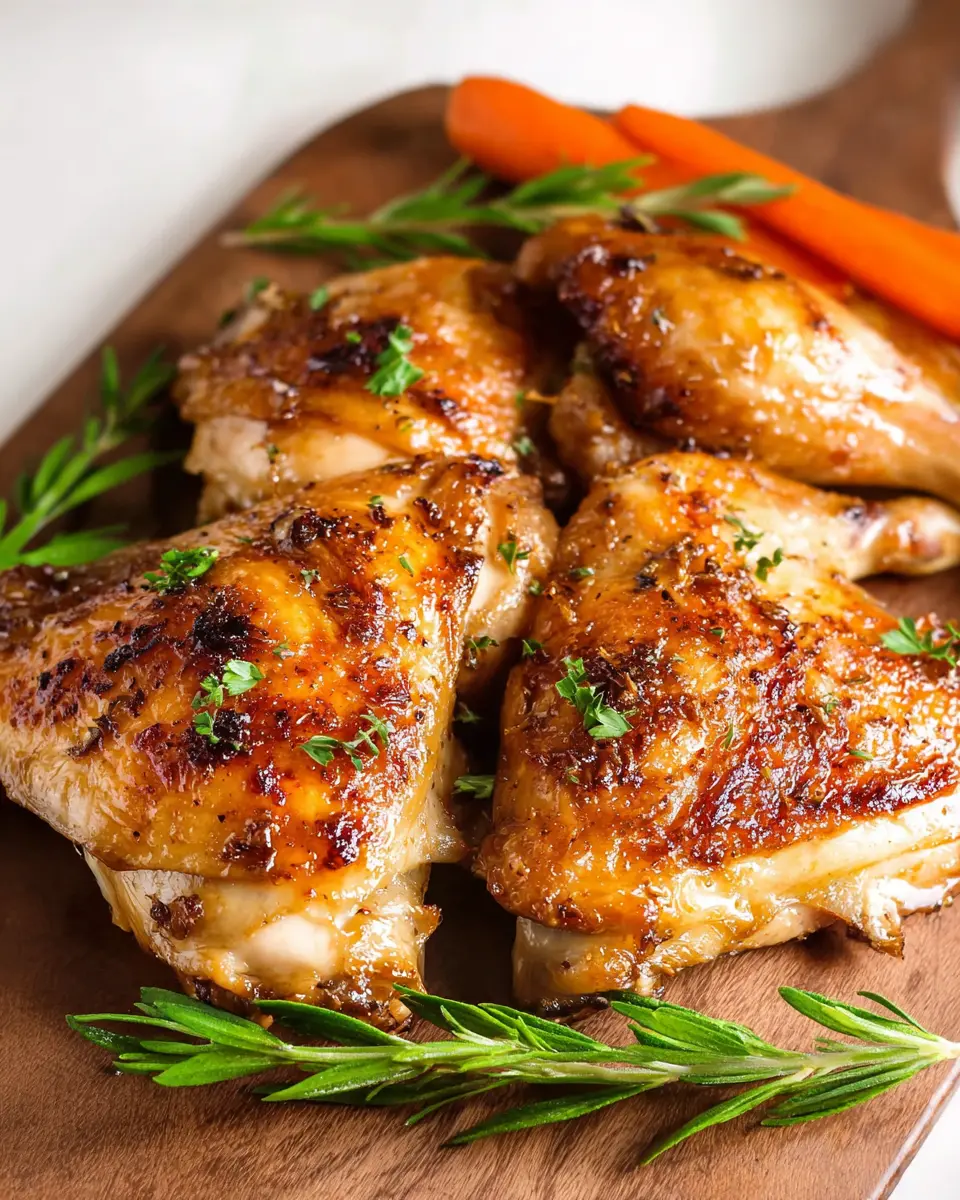
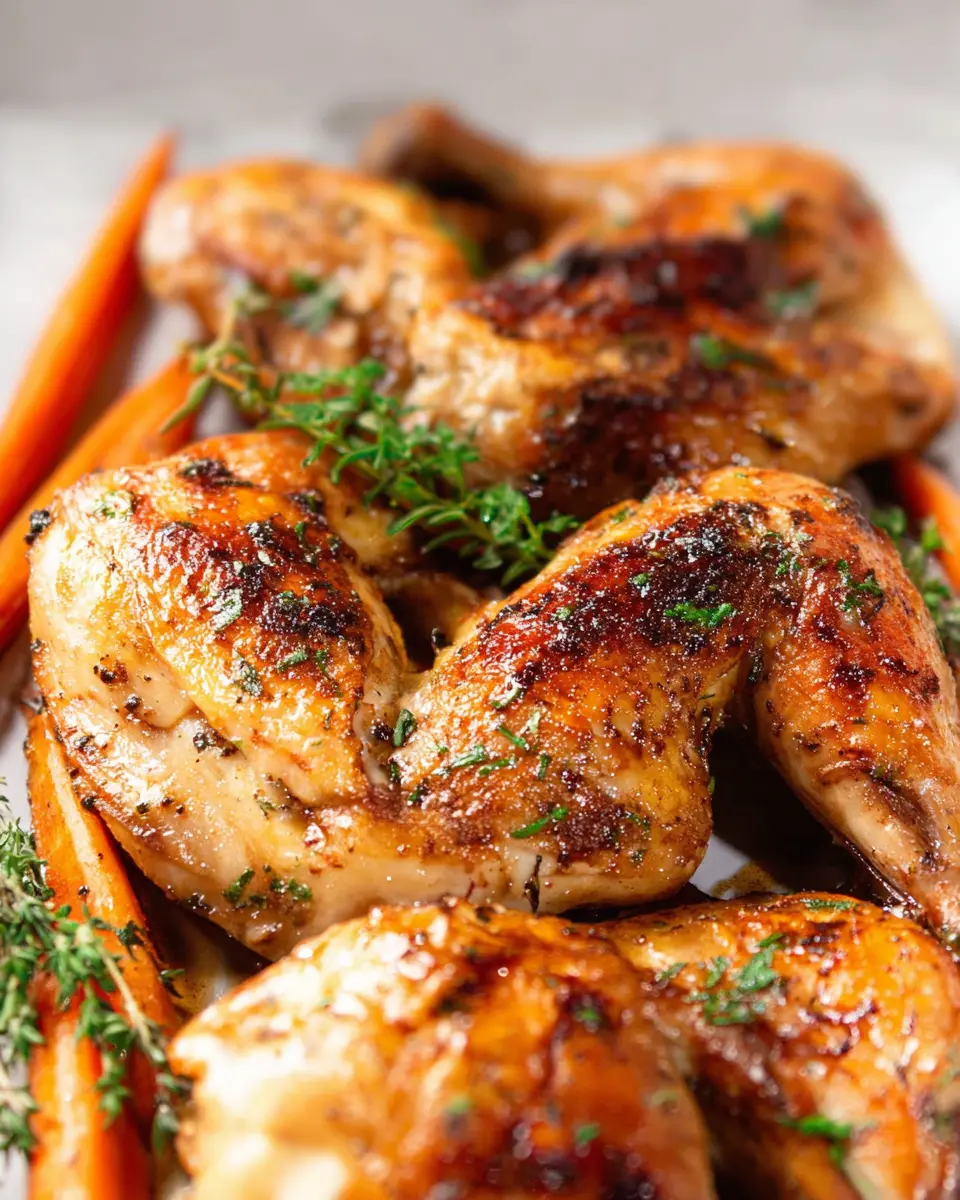
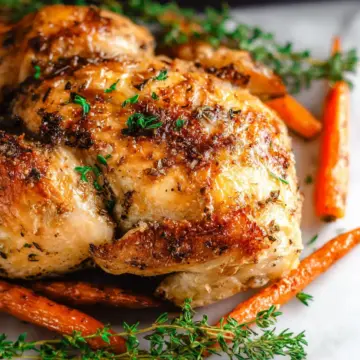
As you explore this recipe, you'll soon understand the magic of the crispy skin combined with juicy meat—a true comfort food classic. So, roll up your sleeves, preheat that oven, and let’s get cooking! Your taste buds will thank you later.
Ingredients for Classic Baked Chicken
When preparing a mouthwatering Classic Baked Chicken, the right ingredients can truly elevate your dish. Here's what you'll need:
-
1 (3 to 4-pound) whole chicken, cut into 8 parts (2 breasts, 2 thighs, 2 legs, 2 wings). The different cuts help ensure everyone gets their favorite piece!
-
Extra virgin olive oil: A vital ingredient for keeping the chicken juicy and flavorful.
-
Kosher salt and freshly ground black pepper: These staples enhance the overall taste, making the chicken well-seasoned and delicious.
-
½ cup low sodium chicken stock or water: While optional for a gravy, this ingredient can add moisture and richness to the dish. It's a great way to prevent dryness and elevate your meal.
Having high-quality ingredients is just the beginning of a fantastic culinary adventure. So, why not check out some tips on selecting the best chicken from trusted sources like USDA to ensure you start strong? Happy cooking!
Step-by-Step Preparation for Classic Baked Chicken
Preparing a delightful classic baked chicken dish can be a simple yet rewarding experience. Let’s break down the process step-by-step to ensure your chicken is juicy, flavorful, and perfectly baked.
Trim and Salt the Chicken
Start by handling your chicken pieces with care. Trim away any excess fat to prevent greasiness. Pat each piece dry with a paper towel, then generously sprinkle kosher salt on all sides. This step isn’t just about flavor; allowing the chicken to sit for 15 to 20 minutes helps remove the chill from the fridge, promoting even cooking. This small wait is crucial for achieving the ultimate juicy chicken texture.
Preheat the Oven
While your chicken is resting, it’s time to get your oven ready! Preheat it to 400°F (205°C). Why this temperature? The high heat will initially sear the chicken, sealing in those savory juices.
Prep the Chicken with Olive Oil and Seasoning
Once your chicken has warmed up, it’s time to give it some love! Drizzle extra virgin olive oil over each piece and rub it well. This not only adds flavor but also aids in achieving that beautiful golden crisp. Don't forget to sprinkle freshly ground black pepper over the pieces, adding a bit more salt as desired.
Arrange the chicken in a roasting pan with the skin side facing up. It’s important to give each piece some space; proper airflow ensures even cooking.
Bake for Perfect Juiciness
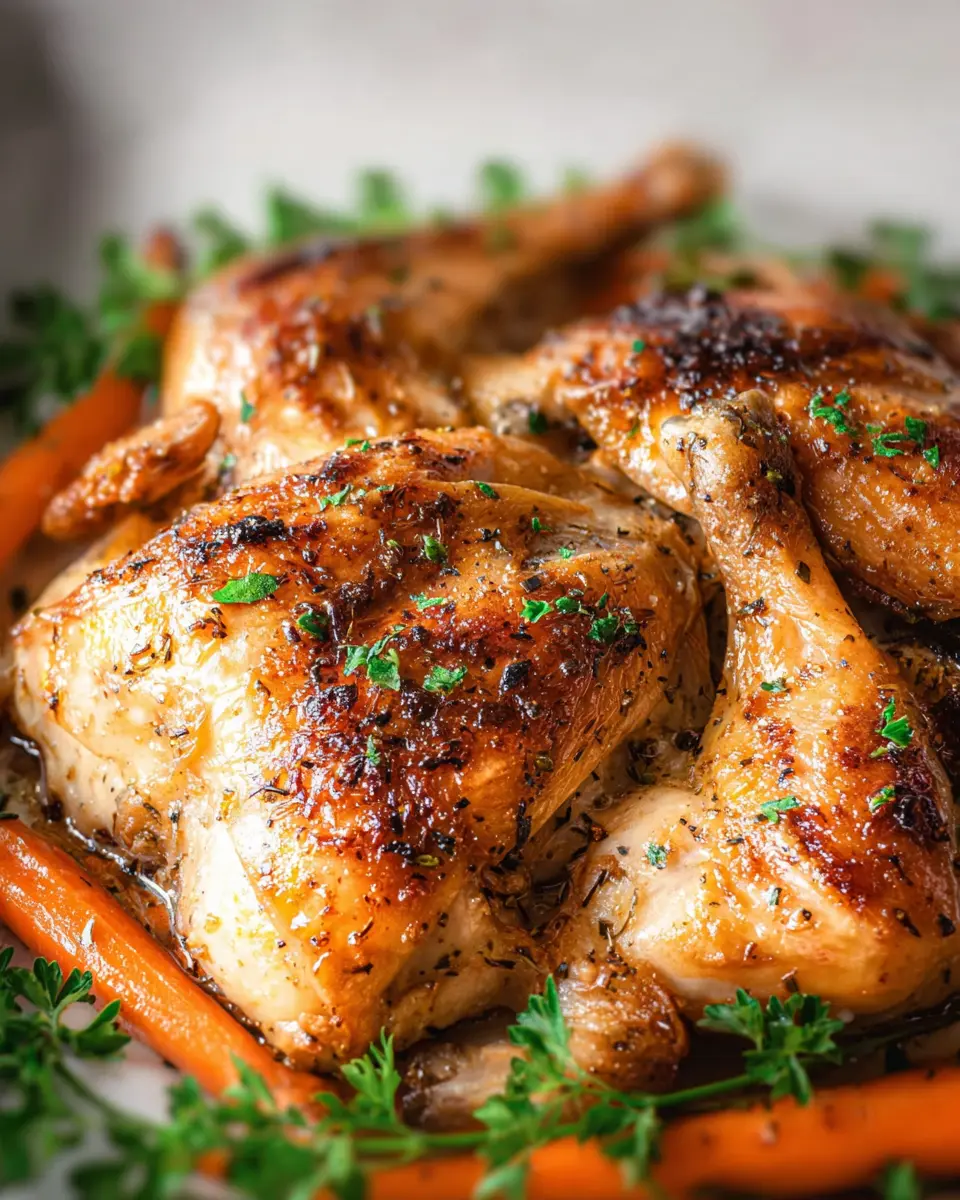
Now comes the exciting part: baking! Slide the chicken into your preheated oven. Bake uncovered for 30 minutes at 400°F. Then, lower the temperature to 350°F (175°C) and continue baking for another 10 to 30 minutes. To check doneness, poke with a knife—the juices should run clear, and the internal temperature should read 165°F (74°C) for breasts and 170°F (77°C) for thighs. A meat thermometer can really take the guesswork out of this!
If the chicken isn’t browning as you like, simply move it under the broiler for the last 5 minutes of cooking.
Let the Chicken Rest for Optimal Flavor
Upon removing the chicken from the oven, it’s tempting to dive right in, but hold on! Transfer the chicken to a serving dish and tent it with aluminum foil. Letting it rest for about 5-10 minutes allows the juices to redistribute throughout the meat, boosting flavor and moisture.
Make the Accompaniment Gravy
If you want to elevate your meal, consider making a quick gravy using the drippings left in the roasting pan. Set the pan on medium heat and scrape up any browned bits. Pour in low-sodium chicken stock to loosen up the drippings, then let it simmer until it reaches your desired thickness. A sprinkle of cornstarch mixed with water can help thicken it even more.
Serve Your Delicious Baked Chicken
Finally, it’s time to serve! Pair your classic baked chicken with some steamed rice, mashed potatoes, or a fresh side salad. The combination will surely delight your guests or family.
Now, doesn’t that sound easy? Enjoy every bite of your homemade masterpiece! If you follow these steps, you’ll create a dish that’s not only delicious but also memorable. Happy cooking!
Variations on Classic Baked Chicken
Transform your classic baked chicken into an exciting meal with these flavorful variations!
Herbed Classic Baked Chicken
For a fragrant twist, mix fresh herbs like thyme, rosemary, and parsley with olive oil to create a herb-infused marinade. Coat your chicken generously and let it marinate for at least 30 minutes. The result? Tender, aromatic chicken bursting with flavor! Enhance with a squeeze of lemon juice before serving for that extra zing.
Spicy Classic Baked Chicken
Craving some heat? Add a blend of paprika, cayenne pepper, and garlic powder to your olive oil before rubbing it on the chicken. This spicy rub will give your dish a bold kick. Pair your spicy chicken with a cooling yogurt sauce to balance the heat.
Feel free to experiment and find your favorite flavor profile! For more tips on cooking techniques, check out these herb cooking tips and spice blends.
Cooking Tips and Notes for Classic Baked Chicken
Resting Chicken Before Serving
After pulling your classic baked chicken from the oven, let it rest for 5 to 10 minutes. This crucial step allows juices to redistribute, resulting in a juicier and more flavorful bite. Tent the chicken with aluminum foil to retain warmth while it rests.
Choosing the Right Chicken Parts
When selecting chicken parts, consider a mix of white and dark meat for a delightful flavor balance. Bone-in, skin-on pieces like thighs and drumsticks are ideal for baking, ensuring moisture and tenderness. If you prefer a lighter option, opt for chicken breasts, but don't skip the skin—it adds a lovely crispness and protects the meat from drying out.
For more tips on selecting the best chicken, check out this guide.
Serving Suggestions for Classic Baked Chicken
Ideal Side Dishes
Complement your classic baked chicken with vibrant side dishes for a well-rounded meal. Here are a few flavorful options:
- Garlic Mashed Potatoes: Creamy and rich, these are a classic pairing that never disappoints.
- Steamed Vegetables: Broccoli, carrots, or green beans add a burst of color and nutrition.
- Quinoa Salad: For a touch of the Mediterranean, toss some quinoa with cucumbers, tomatoes, and feta cheese.
Creative Plating Ideas
Elevate your dining experience by presenting your classic baked chicken beautifully. Try these plating tips:
- Arrange the chicken on a platter with lemon wedges and fresh herbs for a pop of color.
- Use individual plates with a scoop of mashed potatoes beside the chicken, garnished with parsley.
- Drizzle homemade gravy artistically on the chicken for added flair and flavor.
With these serving suggestions, your baked chicken dinner will be impressively delicious and visually appealing!
Time Breakdown for Classic Baked Chicken
Preparation Time
The prep time for this classic baked chicken is a quick 15 minutes. This includes trimming the chicken and seasoning it to ensure each piece is bursting with flavor.
Cooking Time
You'll be looking at a cooking time of about 50 minutes. This allows the chicken to bake to perfection, ensuring a crispy exterior and juicy interior—just the way you want it!
Total Time
In total, plan for approximately 65 minutes from start to finish. This includes both the preparation and cooking phases, making it a fantastic option for a weeknight meal. Enjoy your classic baked chicken with sides like steamed rice or mashed potatoes to complete the experience!
For more tips on mastering your chicken cooking skills, check out resources from sources like The USDA Poultry Guidelines. They’re a great help in ensuring everything goes smoothly in your kitchen!
Nutritional Facts for Classic Baked Chicken
When preparing delicious classic baked chicken, it's essential to know its nutritional profile. Here's a quick overview to help you stay informed about what you're eating.
Calories
A serving of classic baked chicken typically contains about 350 calories, making it a satisfying yet healthy choice for your meal.
Protein
With approximately 30 grams of protein per serving, this dish offers a fantastic source of lean protein, crucial for muscle repair and overall health.
Sodium
While seasoning enhances flavor, remember to use about 300-400 milligrams of sodium in total, especially if you're mindful of salt intake. Opting for low-sodium chicken stock can help manage this.
With a balance of taste and nutrition, classic baked chicken stands out as a flavorful option for any weeknight dinner or special occasion. Consider serving it with sides like steamed vegetables or quinoa for added nutrients and a wholesome meal. For more nutritional tips, check out resources from the American Heart Association.
FAQs about Classic Baked Chicken
How do I know when my chicken is fully cooked?
To ensure your classic baked chicken is perfectly cooked, check the internal temperature using a meat thermometer. The chicken breasts should reach 165°F (74°C), while thighs should be at 170°F (77°C). Additionally, clear juices (not pink) when poked with a knife indicate doneness. If you don’t have a thermometer, you can also check the coloration of the meat—fully cooked chicken should be opaque and juicy.
Can I use frozen chicken for this recipe?
While it’s best to use thawed chicken for even cooking, you can still use frozen chicken if necessary. Just remember to increase your baking time significantly—up to 50% more! Make sure to check the internal temperature thoroughly to ensure it’s fully cooked and safe to eat.
What side dishes pair best with baked chicken?
Baked chicken pairs wonderfully with various sides. Consider serving it alongside:
- Steamed vegetables, like broccoli or green beans
- Mashed potatoes or Spanish rice
- A light salad with a tangy vinaigrette
These combinations enhance the meal while keeping it balanced. For more ideas, check out our guide to perfect side dishes.
Conclusion on Classic Baked Chicken
In conclusion, classic baked chicken is a delightful dish that’s both simple and satisfying. With just a few quality ingredients and straightforward steps, you can create a succulent meal perfect for busy weeknights or family gatherings. Remember, don’t skip the resting step – it’s essential for juicy results!
Classic Baked Chicken
Equipment
- Roasting Pan
- meat thermometer
Ingredients
- 1 whole chicken (3 to 4 pounds), cut into 8 parts
- Extra virgin olive oil
- Kosher salt
- Freshly ground black pepper
- ½ cup low sodium chicken stock or white wine, optional for the gravy
Instructions
- Trim the chicken pieces of excess fat. Pat the chicken pieces dry with a paper towel. Sprinkle all sides with salt. Let the chicken pieces sit for 15 to 20 minutes to take the chill off.
- Preheat the oven to 400°F (205°C).
- Pat the chicken pieces dry with a paper towel. Rub olive oil all over the chicken pieces and on the bottom of the roasting pan. Sprinkle the chicken pieces all over with black pepper and a little more salt. Arrange the chicken pieces in the pan, so that all the pieces are skin-side up.
- Bake uncovered in the oven for 30 minutes at 400°F (205°C). Then lower the heat to 350°F (175°C) and bake for an additional 10 to 30 minutes until the juices run clear.
- If the chicken isn't browning well enough, place the chicken under the broiler for the last 5 minutes of cooking until browned sufficiently.
- Remove from oven and transfer the chicken to a serving dish. Tent with aluminum foil and let rest for 5 to 10 minutes before serving.
- For gravy, place the roasting pan with all its drippings on the stovetop and set the burner to medium heat. Use a metal spatula to scrape up the stuck drippings. Pour in some white wine or chicken stock to help loosen the drippings and heat until reduced to desired thickness.
- Serve with steamed rice, mashed potatoes, or Spanish rice.
Leave a Reply